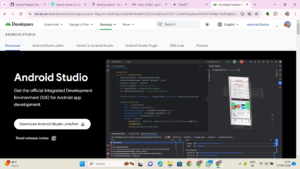
Android Studio is the official integrated development environment (IDE) for Android app development. It offers the fastest tools for building apps on every type of Android device. If you’re new to Android development or switching to Android Studio from another IDE, this guide will help you install and set up Android Studio on your system.
Prerequisites
Before you start, ensure your system meets the following requirements:
- Operating System: Windows 7/8/10 (64-bit), macOS 10.10 or higher, or a Linux distribution with a 64-bit system.
- RAM: At least 4 GB (8 GB recommended)
- Disk Space: 2 GB for Android Studio, plus 4 GB for the Android SDK, emulator system images, and caches
- JDK: Java Development Kit (JDK) 8 or higher
Step 1: Download Android Studio
- Visit the official Android Studio download page.
- Click on the “Download Android Studio” button. Read and agree to the terms and conditions, then the download should start automatically.

Step 2: Install Android Studio on Windows
- Run the Installer: Locate the downloaded
.exefile and double-click to run it. - Welcome Screen: Follow the setup wizard instructions and click “Next.”
- Choose Components: Select the components you want to install. Typically, you’ll want to install the default components.
- Install Locations: Choose the installation locations for Android Studio and the Android SDK. The default locations are usually fine.
- Complete Installation: Click “Install” and wait for the installation process to complete. Once done, click “Finish” to launch Android Studio.
Step 2: Install Android Studio on macOS
- Open the DMG File: Locate the downloaded
.dmgfile and double-click to open it. - Drag and Drop: Drag and drop Android Studio into the Applications folder.
- First Run: Open the Applications folder and double-click on Android Studio to start it. You may need to confirm that you want to open an application downloaded from the internet.
Step 2: Install Android Studio on Linux
- Extract the Tarball: Locate the downloaded
.tar.gzfile and extract it to a suitable location using the command:sh
tar -xzf android-studio-ide-*.tar.gz
- Run Studio.sh: Navigate to the extracted folder and launch Android Studio by running:
sh
cd android-studio/bin

./studio.sh
- Desktop Entry: For easier access, you can create a desktop entry. Follow the instructions on the Android Studio download page for your specific distribution.
Step 3: Initial Setup and Configuration
- Welcome Screen: When you first launch Android Studio, you’ll see a welcome screen. Click “Next” to proceed.
- Install Type: Choose the type of setup you prefer (Standard or Custom). Standard is recommended for most users.
- SDK Components Setup: Android Studio will download the necessary SDK components. Ensure you have a stable internet connection for this step.
- Emulator Settings: Configure the Android Emulator settings. If your computer supports hardware acceleration (Intel HAXM), enable it for better performance.
- Finish: Once the setup is complete, click “Finish” to start using Android Studio.
Step 4: Create a New Project
- Start a New Project: On the welcome screen, click “Start a new Android Studio project.”
- Configure Your Project: Enter your project name, package name, save location, language (Java or Kotlin), and the minimum SDK version.
- Select Project Template: Choose a template for your project. The “Empty Activity” template is a good starting point.
- Finish: Click “Finish” to create your project. Android Studio will set up the project and open the main workspace.
Step 5: Test Your Setup
- Run Your Project: Click the “Run” button (green play icon) or press
Shift + F10. - Configure Emulator or Device: If you have an Android device connected via USB, select it from the device list. Otherwise, create and start an Android Virtual Device (AVD) emulator.
- View Your App: After the build completes, your app should launch on the selected device/emulator.
Conclusion
Congratulations! You’ve successfully installed Android Studio and created your first project. Android Studio is a powerful tool with many features designed to simplify the development process. Spend some time exploring its various functionalities, such as code completion, debugging tools, and the layout editor.
Happy coding! If you encounter any issues or need further assistance, the Android Developer website and community forums are great resources to consult.
